 |
| A sneak peek. |
Tuesday, February 28, 2012
on again off again
Just wanted you all to know that you have not been forgotten. My dear little Anduin is sick today so I'm taking the extra quiet time to blog a bit. I know I haven't been around much and I wanted to let you all know that I have decided to focus less on blogging for the time being and more on my Etsy shop, kittymclewin, which is sadly bare. I have been spending more time in the studio and less time on the computer as a result. I am still planning on posting as much as I can, but it will be less than in the past. Hope you are all enjoying the DIY's that I've been able to run off (see, some good stuff for you straight from my studio!)...til next time.
Saturday, February 25, 2012
DIY message boards
This is another great little project I came up with for Christmas gifts this year. I absolutely love the way these turned out and all you need is:
Chalkboard paint

Ornate metal serving trays (you can find these for great prices at thrift stores and vintage shops)

Now you put them together: Paint a few coats of chalkboard paint into the middles of the serving trays. Add a bow and voila: A really lovely message board; just add chalk.


Extra points if you find one that attracts magnets...then you can hang little what not's on it as well. Have fun!
Thursday, February 9, 2012
DIY chevron canister
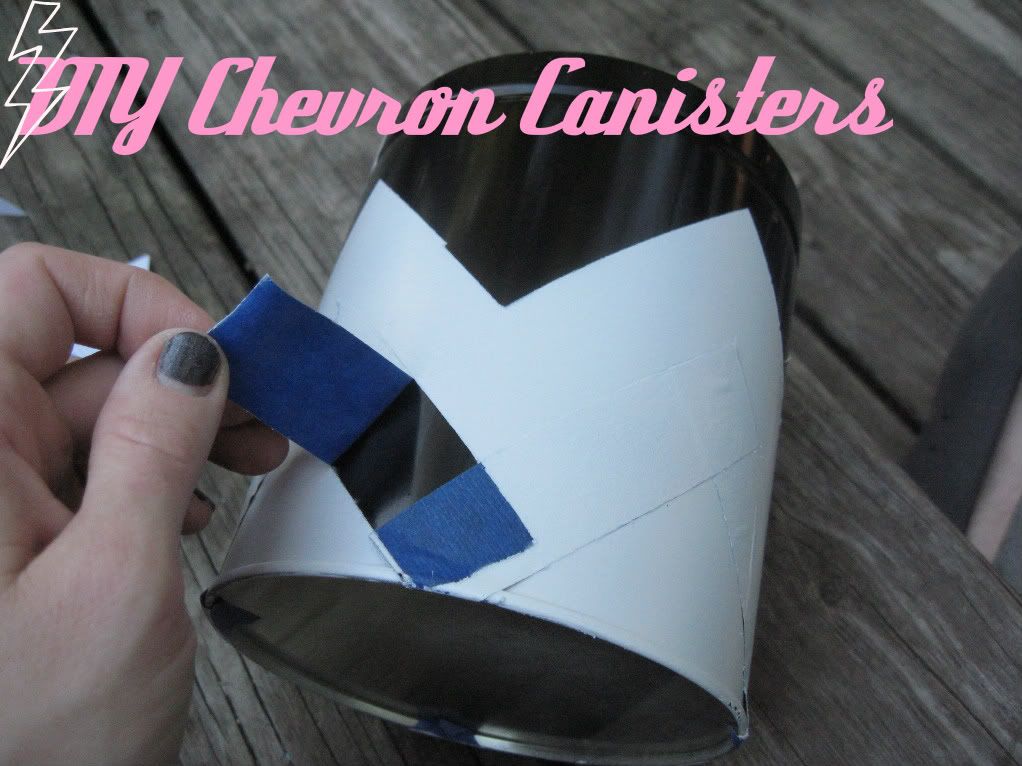
Today you get to learn to make these cute chevron striped canisters.
First of all you're gonna want to spray paint the canisters a base color...like black. Feel free to use primer first or do a few coats of it to keep it from peeling.
Then using some scrap paper and painters tape make your chevron pattern and cover any part that you want to stay black. Do not press hard on the painters tape when you do this or it will peel the black paint off the can!


Then go ahead and spray it white:

Again, use as many coats of paint as needed to get your desired result.
Then simply remove scrap paper and tape.


Til next time!
Monday, February 6, 2012
loveeeeee...and ham

Just came across this image. This is the man I love...and me hamming it up in the mirror behind him. :)
Saturday, February 4, 2012
DIY travel checkers
So here's a little project that I tackled for Christmas this year, and I'm just now getting around to blogging about it. I made a few versions for different folks that with vintage napkins, and gathered closures, but this is by far my favorite outcome. I made it for my son for Christmas. It's a travel checker set for long car rides:

I started it out by creating a stencil for the squares. Then I used painters tape to tape it down to the felt. I used a foam roller to apply the paint.........f.y.i. that was so much easier/ faster than the stipple brush I used to use.

Then I made the checkers. All I did was use Stitch Witchery to glue the orange and yellow fabric to the blue felt. Then I made a grid of squares, cut them out, and rounded them to circles with sharp scissors.
 |
| Here they are displayed atop a mirror I keep around. |
Then I attached the tie to it. All you have to do to close it all up is to put all the checkers in the middle, fold the top and bottom to the middle, then fold the sides to the middle...then tie it up. Voila...pocket checker game.
 |
| You can see that I added a Tic-Tac-Toe grid on the back. |
And this is just some bragging rights :)
I made a really fun wreath for my in-laws out of an old poetry book!

Subscribe to:
Posts (Atom)